Showing posts with label beauty. Show all posts

Sunday, 30 April 2017

YSL Beauté for the Malaysian Beauties - The Low Down & The After Party

(L to R : YSL lipstick code Card, YSL slow-motion video booth)

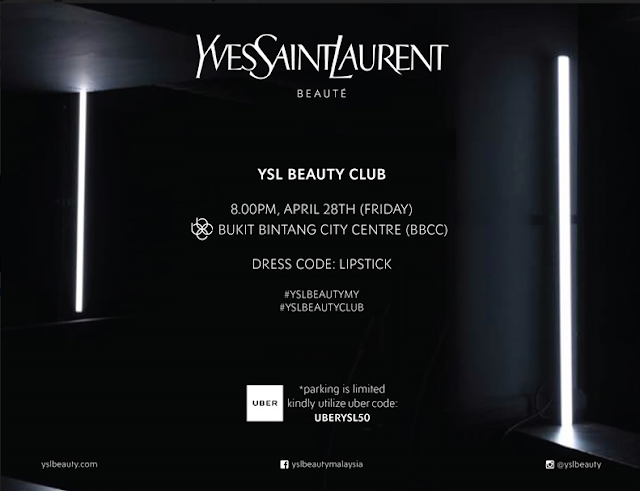
Hi everyone! Welcome BACK to SleepingWithMakeup. First of all, thank you so much for dropping by, I really appreciate the support and all the positive vibes on my blog. And secondly, I am finally coming out of my hiatus and what better way to do that than to start with some YSL Beauté goodness?! Last Friday, on the 28th of April, Yves Saint Laurent threw a massive party which is an international event from the YSL Beauty Club. It is pretty much like a world tour kind of thing as they've had one in Korea, Russia, London, Paris etc. etc. So it was Malaysia's turn last weekend!

The party kicked off at Bukit Bintang City Centre - the place looks gorgeous. We even got our own UBER from YSL which I find very helpful - but if you know KL, you'd know KL on Fridays is just horrendous in traffic so I've decided to take a train instead! 


We got to play around with loaaaads of YSL makeup and each of the guests were given a YSL lipstick to be engraved at the event. Good news is - the same engraving service will be available at their new YSL flagship boutique that will be opened in Pavilion Kuala Lumpur. I didn't get mine engraved that night just to give myself an excuse to come visit the store :P The one I've received was the Rouge Volupté Shine Oil-in-Stick in the shade 12 Corail Dolman (more on these soon).


(L to R : trying on YSL Touche Eclat Cushion and Rouge Volupte Shine lipsticks, YSL Vinyl Lipsticks, some of YSL's makeup brushes (super soft!), and a mess of makeup play

The party was a celebratory of the launching of YSL hence there were a lot of mingling, music and macaroons! I did do a whole YSL makeover which was amazing and I think I'm most excited for the lipsticks and their bronzers. No more going over at tiny duty free stands for YSL, as the new flagship will be the largest YSL Beauté flagship in the world!

So, here's some of my own personal list to look out for on the 3rd of May -


Les Sahariennes Bronzer, $55 - A silky balm-to-powder bronzer in a semi-matte formula (contains shimmer, but very micro-fine). I've been dying to try this out as I am a bit blush/bronzer obsessed and the shade 3, and 5 absolutely looks gorgeous. You can have a look of the different shades here 

Touché Eclat Blur Primer, $52 - Reminds me a little bit of the Hourglass Veil Mineral Primer, (even price-wise, but I daresay Hourglass is pricier). It claims to give the skin a smoother and glower appearance - as I am a bit on the drier side so this seems like the more hydrating option compared to the Hourglass primer.

Baby Doll Kiss and Blush, $40 - I saw this on Huda Beauty's channel where she was using the shade 10 Nude Insolent if I'm correct. And it looks so niceeeee against her skintone. I've swatched the same shade at the event and formula-wise it is much more hydrating matte lipstick due to its mousse-like texture. Definitely a staple for an on-the-go makeup bag. More shades here

Volume Effet Faux Cils (Original), $32 - Years back, a 14-year-old me gotten a set of YSL Baby Doll perfumes and their Volume Effet Faux Cils Baby Doll mascara, and I was in love. The mascara was pitch black and coated my lashes perfectly without being clumpy. It's almost mandatory for me to try out the elder sister of the Baby Doll mascara, the Volume Effet Faux Cils - of which I'm pretty sure will wow the 24-year-old me :P

Touché Eclat Face Highlighter Pen, $42 - When I first used this in my yesteryears, I've treated it as a concealer - which was a no-no. This product works as a highlighter, without the overly- shimmer finish we get from most highlighters nowadays. I use to wear the shade 1.5 Radiant Silk and 2 Luminous Ivory but the YSL pro makeup artist chose the shade 3 Light Peach on me and it looks so, so good. So I have to recheck my shade soon before purchasing it, but, this is just a YSL classic and a must-have. Side note, this was formulated by Terry de Gunzburg which is one of my favourite makeup brand so - yeah - try it out!


(L to R : All glammed up with @bella.52 , the YSL Vinyl DJ set with REAL lipsticks as the console,
Ending the party with @minaros3 , some of YSL guests - Daeng Syahadat, Wendy Mei and Jason)


All in all, a hearty welcome to YSL from the Malaysian beauty community! You will be stunned by how amazing the community is here. Anyway, share your thoughts and excitement with me! We need a little bit of catching up to do :) 


Thank you for hanging out! x Farah A.


Saturday, 6 August 2016

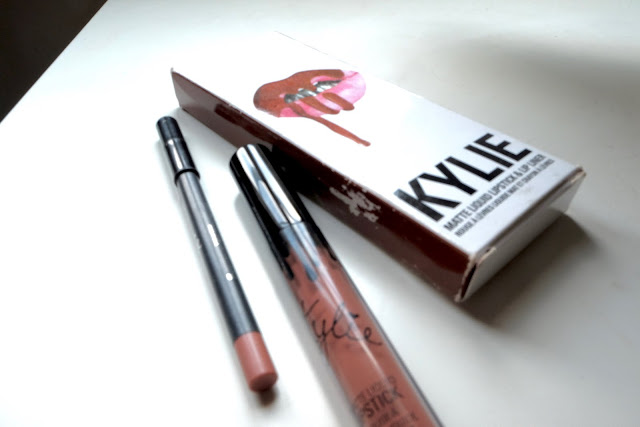
Is It Worth The Pain? Kylie Cosmetics Lip Kit in Dolce K


So a lot of you have been requesting for me to review the Kylie Cosmetics Lip Kits and here it is (finally). I swear to God I fell for the major hype especially for Dolce K which is one of her first few shades of the liquid lipstick collection, because that colour looks so freaking good on King Kylie herself. Like, lawa nak mampus. So, I berangan la that I can look like Kylie Jenner by buying Dolce K. Hahahahahaha. So, anyway, kudos to Kylie for her successful brand, at 19 years old, cmon you gotta give credit where its due. The only marketing tools she needed was her Snapchat and Instagram and these lip kits are flying off the shelf. Literally. Whenever she restocks these mofos, it will be sold out in less than 5 minutes. And its not just her. Anything the Kardashian-Jenner sisters come out with will literally be gone in a sec. Sometimes I do feel bad for Rob Kardashian's socks line - which needs PR boost from mamma Kris herself. Sigh. Congratulations on the wedding tho Rob. We love you.

ANYWAY. LIPSTICKS. Where do I begin?


Price & Packaging

The Kylie Lip Kits comes with a set of liquid lipstick and a pencil liner. So you're kinda getting the whole package right there. For me personally, I love a lip liner for regular lipsticks but to be honest with liquid lipsticks, you don't really need a lip liner with it because the usual standards for liquid lipsticks is that you get full opacity with the colour anyway. Which is why as of now, Kylie Cosmetics has released Matte Singles of both Liquid Lipstick ($17.00) and Lip Liners, 1.0g ($14.00) as oppose to getting the whole set at ($29.00). So, there's that. Personally, for me, I would just get the lip kits because I am a lip liner fiend and its technically slightly cheaper for me (them kits still expensive tho) because I know I'll come back for the lip liner if I get the liquid lip anyway.

So, you don't get a lot of product in the liquid lipstick, at 3.25ml, whereas in comparison to Jeffree Star Cosmetics Velour Liquid Lipstick, you get a hefty 5.6ml at $18.00. So, in all honesty, this is quite pricey for a newly launched brand, you know what I am saying. I wouldn't have an issue to pay that much for a Make Up For Ever lipstick or NARS, because its they are well-established companies by professional makeup artists, so you know you're going to get your money's worth. Anastasia Beverly Hills (3.25ml) liquid lipsticks and Huda Beauty Liquid Mattes (5.00ml) both retails for $20.00 and Stila Stay All Day Liquid Lipsticks (3ml) are $24.00, for further price comparisons. So for me, Kylie Cosmetics comes third after Jeffree Star Cosmetics and Huda Beauty solely in terms of price point.

The Lip Kit comes in their signature Kylie Cosmetics graphic lip art and for the liquid lipstick, it has a slender and stubby doe foot applicator which is really easy to manoeuvre. BUT. I've had some issues with the pencil as the core of the pencil (the product itself) wasn't properly integrated with the casing so the product slips around while I'm using it. Not cool. I can't even sharpen it properly because it will be just break off.


Colour

Dolce K is described as a deep beige nude via KylieCosmetics.com but on my skin-tone it is pulling a  slightly mauve- deep nude colour, with really cool undertones. It is a colour that I can't pull off if I'm not wearing the right makeup or the right outfit because it is quite different from the usual nudes that we see. I don't have any lipsticks similar to Dolce K from my collection. It also leans a bit grey which is why it has a cooler undertone. The lip liner is very much lighter than the liquid lipstick itself and I have them swatched below so that you guys can see a comparison. The lip liner I have no issue with using to class or for coffee somewhere because it is not as dark as the liquid lipstick. It reminds me a little bit of M.A.C.'s Stripdown.

How many times have I worn this out? Three times since I've purchased it. Granted, I'm not in love with the colour. If you have a beige-neutral skin tone like mine, and you want an everyday nude from the Kylie Lip Kits shade range, go for Candy K which is a lighter and pinkier version of Dolce K or Koko K which is a pretty pink shade. Koko K is a really gorgeous shade. I feel like Dolce K would flatter lighter skin tones and darker skin tones as the colour will pop a bit more in contrast. But with medium-fair skin like mine, it almost blends in too much yet looks dark at the same time. Its a gorgeous colour, its just not my favourite. If you're in love with colours like Colourpop Beeper, Colourpop Trap, and Urban Decay 1993 I think you will LOVE Dolce K. Very 90's.


Dolce K lip liner


Dolce K lip liner + liquid lipstick

Texture & Finish

Ok, lets talk formula. For the lip liners, the formula is super creamy and glides on so well without crumbling or anything like that. To be honest, it is as creamy as the By Terry lip liners (or dare I say, creamier?). I really love the Kylie Lip Liners. The pigmentation is also very good, and it doesn't cling on to dry patches on my lips and just glides on perfectly. The only problem is the packaging issue where the core is slipping out from the handle, so if you have the Kylie Lip Kits, let me know if you're running into the same issues. The lip liners of course, have a matte finish and does not settle into the fine lines of your lips. It doesn't feel drying as it is a creamier product but I highly suggest you moisturise your lips before any application.

As for the liquid lipstick itself, the formula is very liquidy and runny at first when I got them around four months ago, since there is a lot of product on the doe foot applicator. What I like to do is to take off excess product on the sides of the tube so that I don't overload my lips with a thick layer which may cause the liquid lipstick to crumble and settle into your lip lines. With Dolce K, you do not need to double layer because it is a hundred percent opaque, the pigmentation is impressive! It dries down to a powdery matte finish and when you put your lips together it has a velvety feeling to it almost like you've taken a bit of loose powder and mattified your lips. It does feel comfortable on the lips but you can see from the photos that it can accentuate the fine lines on your lips. Nothing too crazy, I feel like all liquid lipsticks tend to do that.


Application & Wear-time

The application for the liquid lipstick is suuuuper easy as the doe foot allows me to contour my lips perfectly. Also, the liquid lipstick has a really sickly-sweet vanilla scent and flavour to it which I personally like, it smells so nice!! I'm sure you guys will love it. But if you can't tolerate scents, just a heads up. The wear-time for this is not bad, ranging from 4 - 6 hours with the need for touch ups. But to be frank, I wore the lipstick out in mid-day and the wear-down of this lipstick is not cute. It looks super crumbly and dry after a 9 to 5 class so please be prepared to excuse yourself to the ladies for a touch up after your lunch break. I think on a particular day, I completely gave up on the lipstick and took it off to swap for a more hydrating regular ol' lipstick. You have been warned. This may look good on Kylie for the whole day thanks to her glam team and when she's just going out for coffee. But if you're an architecture student in the tropics and having studio crits for one whole day, this lip kit isn't your friend.


Swatches L to R : By Terry Perfect Nude lip liner, Marc Jacobs Nude-ist Poutliner, Kylie Cosmetics Lip Liner in Dolce K, Kylie Cosmetics Liquid Matte in Dolce K, Chanel Lip Definer Mordore Nude, Catrice Cosmetics Lip Liner in Macadamia

Overall, is it worth the pain? I would say if you are a fan of Kylie Jenner, go for it. But if you're looking for a high quality liquid lipstick that will be your favourite, this is not it. The price point is not bad, but you don't get a lot of product and the formula is mediocre but it doesn't wow me. If this Lip Kit is your all-time favourite, share with us down below!! I would love to hear it!! Congratulations to Kylie Cosmetics for the rave success and becoming every girls favourite liquid lipstick, I mean there must be a reason that it is sold out in less than a minute. But I personally don't see it. Sorry King, maybe next time.


x Farah


Tuesday, 19 July 2016

Moonshot Cosmetics by YG Entertainment : Haul & Review


Hey guys! Its been long overdue, but Moonshot Cosmetics has finally touched down Sephora MY - and they have been receiving a lot of buzz since their initial launch, we see it on the stands, but what are the hidden gems within the brand? For me personally, trying out Korean makeup can be quite confusing at times as there aren't a lot of thorough or helpful reviews online, and theres's little product information as it's all written in Korean! - so in the end, I have to physically go to the stores to swatch and try the products itself. Hence, I hope this review will help you guys get a little idea of Moonshot Cosmetics and their products.

So, if you are die-hard fans of Big Bang and K-Pop music industry, you'll probably heard of the record label called YG Entertainment. They've decided to slay the makeup game by partnering with Korean's best R&D team, COSON Group to come up with an individualistic, interesting makeup line - and it represents their niche of eccentric and trendy style really well. I mean, look at Sandara Park and G-Dragon, who are their spokesperson for their new Cushion makeup range - nothing about them screams "bland"!

I was invited to their Sephora My launch for their Microfit Cushion and yes, I got to meet DARA! She was so lovely to all her fans and it was really unfortunate that she only got to stay for 20 minutes due to the traffic she was caught in on her way to the event. I know, bummer! But the launching was so awesome as they brought the Moonshot makeup artists, or Moonshot Boys, over to the launch! I got to do a makeover with them as well. The Moonshot boys were really amazing and friendly and had made the whole launch event much more fun! They even took photos with by-standing fans. So cute.


Alright, lets talk makeup.


Moonshot Multi Protection UV Bouncer SPF 50+, PA+++, 50ml (MYR133.00)

This is marketed as a primer, or base by most of the makeup artists from Moonshot. So, from what I can say is this acts like your transition step - right after skincare and right before makeup. It feels like a hybrid of a lotion and a gel, and it sinks into the skin quite fast but leaves a film of smoothness onto the skin like a primer would. It has a very lightweight texture, so I'm assuming it is more of a chemical sunblock rather than a physical sunblock which are more creamy and heavy. It has a very strong cucumber fragrance to it which I don't really like, but to be completely honest, it does help with the wear of my makeup! I went shopping immediately after I've done my 100% Moonshot makeup, and I've noticed that my mascara didn't smudge, and the Moonshot Cream Paint did not melt off my skin! So kudos to that. Although, I still won't replace my sunscreen with this - but it is a good option if you don't use any kind of sun protection in the first place. It has a slight tackiness to it which helps in applying concealer and foundation and doesn't leave the skin looking too oily or too matte. Just a very nice satin matte finish. The full size bottle comes in an opaque black tube with a pump, so the ingredients are preserved very well and you can stretch out the expiration date longer. Nice!


Moonshot Microfit Cushion in Shade 101, (MYR110)

Okay, so this is the sucker that everybody went crazy about. Since the promotional videos and campaign shoots are heavily promoted with G-Dragon for the Microfit Cushion and Sandara for the Moonflash Cushion (a highlighting base), I get a bit sceptical with this as it was a bit hyped up - but is it really worth the hype? So, lets just forget about the hotness of GD for a second and focus on the product itself for a second. I had very high hopes with this cushion foundation because I was looking for a dewy base and something light to lug around on the go, so a compact cushion foundation seems the way to go, am I right?

If you're not sure what a cushion foundation is, it is basically a compact like your usual powder compact but it houses the liquid foundation in an antibacterial sponge which you then gently pat with the antibacterial puff and pat it onto the complexion. For the Moonshot Microfit Cushion, the packaging feels a little bit cheap for me but it is very lightweight so it is a good option in a sense because I hate the feeling of carrying heavy handbags from all the makeup I lug around.

As for the coverage, and texture, it feels very hydrating and cooling on the skin and sets into a powdery finish - which a lot of Korean bases tend to have. Personally, I do not like the powdery finish as I prefer something a bit more dewy. But I guess that is why there is a Moonflash Cushion which would probably go well patted on top of the Microfit Cushion to give a more dewy effect. It has sheer-medium coverage but it is very buildable to get a more fuller effect, so it's very flexible with the coverage. What I like about the Microfit Cushion is that it doesn't feel heavy at all, which is really what you want when you're in a tropical country like Malaysia.

The only (and fatal) downside of this product is probably the shade range, as it only carries shade 101 and 301 which are more of a cooler pink undertone shade, and shade 201 which has an olive/warmer undertone to it. And that's it. Three shades. The one I have at hand is in the shade 101 which is too light for me, hence I have only swatched it for you guys in the picture below. You can see that it leaves a grey tinge to my skin as it is too light for me and it has an "anti-darkening formula" which basically translates to having whitening properties to the formula. If you are familiar with whitening products, you would know that it leaves an unnatural looking "white cast" behind if you're a medium-tan skin. So I'd recommend to swatch the shade 201 in-stores for medium-tan skin gals. When used sheerly or really well-blended into the skin, the shade 101 is not too awful I must say, I can work with it by adding in a cream bronzer on the outer perimeters of my face or mixing in a drop of darker foundations I have at hand.

I'm actually interested in their three other foundations, which are the Face Perfecting ranges - they carry it in a Balm, Liquid and Stick. They do have a wider shade range for those, so chances are it will be a better match for my skin from the Microfit Cushions.


Moonshot Dark Spot Concealer in shade 301, 7g MYR96

Oh this concealer! I loveeeee it. I was running out of my Diorskin Star concealer which is my faaaaavourite concealer of 2015/2016, and I've decided to pick this up at Sephora Avenue K. So, when you purchase two of Moonshot products, you get a free miniature Cream Paint, which is awesome because I wanted to try those too without committing to the full size. Okay, this concealer comes in a really sleek packaging, reminiscent of the Nars Radiant Creamy Concealers, I must say.. (even the consistency!) and the doe-foot applicator is just the right-size for my undereye concealing needs.

For the Dark Spot Concealers, what I noticed is that the second ingredient for this product is Titanium Dioxide which is probably what it meant when it has an-anti darkening formula (same as the Microfit Cushion). Shade 301 is a medium-beige tone concealer with peachier undertones so it works really well in brightening up sallow skin. I really like to focus the product on the under eye and work it in with the beauty blender and dabbing the excess onto the outer perimeters of the face. It has a really high coverage, and you only need a little to cover a lot!

The texture of these are more creamy and glides on to the skin so well without gripping any dry patches on the skin. So I can see that this will work well on a lot of skin types as it is not drying at all but at the same time, it doesn't make your skin look like an oil slick. As with the Microfit Cushion, it has a slight fragrance to it - not unbearable  I actually kinda like it, but once you've blended it into the skin the fragrance sort of disappears after a while.

I do like using this mixed in with a glowing primer, like the Becca Shimmering Skin Perfector or the Dior Glow Maximiser, kind of like creating my own CC Cream. I really love the concealer to cover the under eye and it works quite well on dark spots as it claims. But for extra coverage, leave it on for a hot minute before going to blend it out so that it sets a little and doesn't move around too much. It gives the skin that glowy type of finish that I expected the Microfit Cushion to have, so in all honesty I'd rather you get this than the Microfit if you want a bang for your buck. I find that I did not need to set the concealer when I was going out, and it still remained intact on the skin. If you do a thick layer or add another layer onto the skin, you can visibly see that it becomes slightly powdery looking so a little bit goes a long way!


Moonshot Jelly Pot in M05 Cocoa Fondue, 7.5g MYR90

The infamous Jelly Pots. Okay, as far as I know - their famous shades are PO9 Hawaiian Sand which is a shimmery champagne pink and P06 Bronze Champagne. There's a reason why the P-shades (pearl finish) are top sellers than the M-shades (matte range) because to be honest, I didn't quite like the one I have! Here's the breakdown of the review -

Okay, so the shade that I got was M05 Cocoa Fondue which is taupe-dusty pink shade. It looks so gorgeous as a contour shade on the eyelids, even on the face actually (I've tried it before!) as it runs cool-toned and provides a subtle shading to the eyes without looking overdone. Anyway, the texture of these jelly pots are very liquidy and runny, so it is advisable for you to use either your fingers to apply and blend or a synthetic brush. The thing about this product is that it comes in a jar and the jar is quite wide and shallow which means that air seeps into the product and dry it out! Boohoo. I've had this for less than six months, and you can tell from the photo that its already starting to become more powdery. I suppose it will be the same case for their shimmers as well.

The shade itself is so pretty so it is unfortunate that the product dries out so quickly. The Jelly Pots do set quickly so once you've applied it onto the eyelids, blending can be quite trying! I suppose the shimmers will be more forgiving as you do not need to be too precise with the pearl finishes. I do find that it creases a lot as well if I try to layer it for more pigmentation, as MO5 Cocoa Fondue slacks in the pigment department. It sets into a powdery finish which is good for my oily lids but I do need to work in thin layers to avoid any creasing and cake up with these.


Moonshot Cream Paint in Dragon Fruit, 7.5ml MYR92

The one I have is the miniature size of the Cream Paint, where the doe foot applicator varies between the miniature and the full size. In the full size version, you get an oddly large round applicator which in my personal opinion is a packaging flaw, as it is too large to get a precise line for application on the lips. I prefer the applicator on the miniature version in my opinion. Although, packaging aside, the product itself is amazing! The shade that I have at hand is in Dragon Fruit, and it precisely looks like a dragon fruit! A pinkish red cream with a cool undertone (makes your teeth look whiter!). It leans more on the pink side.

This product, as with the Jelly Pots, are marketed as multi-use makeup, so be creative! I can see that this would make an interesting product to be used as an eye gloss too because it does have a slightly glossy finish that I love in a cream product! The Cream Paint is so pigmented, that when used as a blush, one tiny dot is enough for the product to show up on the skin. I absolutely adore this colour when used as a blush because it livens up the face in the most natural way but I like to layer it so that it gives a more intense look. Lately I've been into the pop of blush look.. so bear with me hahahaha.

This babies, albeit being creamy and hydrating, has a slight tackiness to it which helps with the product being long-lasting! I wore this out for I think more than 6 hours and the pigmentation of Dragon Fruit lasted through the day, on both the cheeks and lips. I like that you will be able to manoeuvre the intensity of the look you're going for, just put a dot on the centre of the lips and blend for a sheer wash of colour - or, glide the applicator on your lips for an intense colour. Quick and easy. The colour ranges of the Cream Paint is wonderful, too. They have lilacs, oranges, pinks, reds, even a blue one! Go ham. Check them out at Sephora. Other than that, I'd say texture-wise, it does not feel like a lightweight cream when you first apply it, but once blended you don't feel it on your skin. I think the Cream Paints are a must-have from Moonshot. It does claim to set into a powdery finish, but I find that it sets - doesn't look powdery at all. It's a good thing.


swatches : Jellypot in Cocoa Fondue, Cream Paint in Dragon Fruit, Microfit Cushion 101, Dark Spot Concealer in 301


Multi Protection UV Bouncer SPF 50+ PA+++


Dark Spot Concealer in 301 on the centre of the face and blended out with a Beauty Blender


Glow! Look at how even the skin looks, I love it.


Cocoa Fondue on the lids, and Dragon Fruit on the lips and cheeks.


Dragon Fruit + concealer to give my makeup the signature Korean ombre lips effect. I actually like how it looks and chose this option to wear out to go shopping later that day.


And that is it! In a nutshell, Moonshot Cosmetics has a very unique range of products that do perform well and not just be construed as gimmicky. In particular, I really fell in love with the Cream Paints and Dark Spot Concealer! If you feel like trying out this brand, I suggest to start with those two or you can substitute the Concealer for any products from their Face Perfecting range. I will be picking up the Face Perfecting Balm next. Overall, I do like their Color Makeup, and the Jelly Pots, they even have a G-range which are Glitter finishes! I just hate that it dries up so quickly tho! So frustrating. I hope Moonshot will come up with new innovative products in the future! I have high hopes for this brand. Their aesthetics, and bold products just really have won me over. There are a few duds regarding the shade ranges and "anti-darkness formula" with the Microfit Cushion just doesn't quite.. fit. Let me know what are your favourites and not-so favourites from the brand in the comments down below, and thank you for hanging out!


x Farah A.
(p.s. check out the label "k-week" below to discover more Korean/Jap beauty finds)

Sunday, 19 June 2016

SUQQU Eyebrow Liquid Pen R in 01 Moss Green


Hi guys!! Today, I wanted to carry on with the K-beauty/Japan beauty haul and reviews - and we are going to kickstart it with a bit of SUQQU. I have been so bad with regular posts due to a very packed semester but you all know you can find me on Instagram or Snapchat (ID : kingfrh) where I do post mini-reviews and hauls, so come and say hi x

Anyway, I have only heard about SUQQU from Lisa Eldridge's channel, and she has mentioned two products from SUQQU which are a must-haves from her kit - first, is of course the infamous SUQQU cheek brush and secondly, is their Eyebrow Liquid Pen in 01 Moss Green. I was very intrigued by the brow pen as I have used all types of brow products (pencils, pomades, powders, gels) yet I have yet to try liquid. Coincidentally, my brother was visiting Japan with his friends there, so I asked him to purchase it for me there - saves me on postage :) hehe. I was so anxious that my brother will mix up my request but he came thruuuuu (although you should've heard him panicking at the makeup counter - like a lost lamb hahahaha).


Price & Packaging

So, as you can see from the photo - the packaging is a little bit damaged due to it surviving the flight in the midst of my brother's luggage (why, oh why). Boys do not understand makeup! I would have kept this in my carry-on!! Anyway, it comes in an otherwise sleek black box with the label engraved on it (laser-cut no less, fancy!) as well as the product name - Eyebrow Liquid Pen R. On the back, it has written directions in both Japanese and English, I'll highlight the important ones - 1. Wipe the brush off with tissue after every use 2. Store the pen horizontally. It is quite an interesting direction as for us architects, we have to treat our German-made technical pens with the same amount of care. Hence, I would advice against lugging this around in your makeup bag unless you are completely sure that it will remain horizontal!

The Suqqu brow pen retails for 3240YEN or £20 via Selfridges (they do international shipping!). That translates to about MYR120 which makes the Burberry Eyebrow Definer similar in terms of pricing. For MYR120, it's safe to say that I wouldn't mind repurchasing it. Although, I wouldn't ship it directly from Selfridges - maybe ask my family members/friends staying overseas to assist me. 


Colour & Pigmentation

As the name suggests, 01 Moss Green is exactly what it is. MossGreen. It is a taupe-green shade with a cool-undertone. For the pigmentation itself, it is opaque enough to show up on my beige skin, but translucent enough for the brows to look natural and not look too drawn on. Honestly, it is very opaque for my liking as I don't like my brows to look stark/blocky. I really like how the greenish shade of the brow pen thickens my brows in a natural way and not look too blocky and squared. Somehow it just works with dark-haired girls. The olive shade just blends very well with my brows and since the brush tip is so fine and soft, I was able to create little tiny strokes to mimic brow hairs and finish off the tail of my brow which usually is a bit difficult if I'm using a pencil. I never have cleaned the brush with a tissue, but it still looks brand-spanking new and there is no issue in clogged up ink or anything. The handle of the brush is only 90mm long while the brush is 7mm long, so it is quite petite in size hence the reason why I always lose it in between car seats, so be careful! Despite the size, I can still get a good grip and draw on the brows with ease.


(first attempt, fail!)

Texture, Finish & Application

The SUQQU Eyebrow Liquid Pen R has a very runny texture (duh). The product is obviously in a liquid form and completely doesn't budge after application. It doesn't change the texture of your brows like pomades and gels do, and it has a satin-matte finish. It doesn't look like a flat-matte as it is a more hydrating product. Upon application, you can feel that the brows feel a little bit wet, and I love to concentrate it in between the brows and draw onto the base itself rather than on top of the hairs - if that makes sense. So it creates an opaque tint on the base of the brows without changing the texture of the hairs. Of course, I do top it off with either the EYEKO Tinted Brow Gel or the Innisfree Brow Cara since the SUQQU brow pen does not give any hold to keep the brow hairs in place. The Eyebrow Liquid Pen R lasts through humidity and heat so you are definitely getting a bang for your buck with these as there is no need for touch ups! I have to be honest, it does take quite some time to get used to the texture and the way to use this brow pen, but after a few practice I got the hang of it.


(after countless of practices hahaha)

So, these are snippets of how my makeup looks like with the SUQQU Eyebrow Liquid Pen R in 01 Moss Green. I feel like it really enhances my brow shape and doesn't come off as too cakey which is what I like to go for. I do use this daily since I first purchase it, and as I mentioned before - there seems to be no problem in clogged inks and product build-up as the ink is very smooth and not thick enough to clog up. Overall, I do feel like it has become a necessity in my makeup routine, for even when I'm having a no-makeup day. The only con that this product has is that there are no SUQQU counters in KL! Boooo. Please bring in SUQQU! I really like that I can get a sharp tail with the fine brush tip and if you're looking for a similar product, Stila makes a similar brow pen - and I think a few Japanese/Korean brands you can find at Guardian/SASA/Watsons would have something similar. If you have a SUQQU counter near you, go and check these out! So, that is all for today's post and again, thank you for hanging out!


x FARAH